
After my last post, which was entitled, “Fall,” I was asked how I go about preserving things I find in nature, or grow in my garden. Since it is the very start of fall, and there is still plenty of time, I thought I would share a little bit about that.
As the wheel turns to the season of fall, and the weather begins to cool, I find myself filled with excitement, for bringing the out doors in. I love to decorate and I love being out in nature, so I do my best to bring natural elements inside my home. All you have to do is step outside and the possibilities are endless. Something as simple as a pine cone can be turned into something special. Gathering is always an adventure and is sometimes the best part. I encourage you to get out there and give it a go!
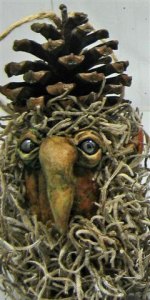
pine spirit
Seed Pods
Today, I gathered seed pods, that I refer to as “Sputniks,” from a neighbor’s massive sycamore tree. (They appear slightly spiny and are roughly about the size of a golf ball.) I’ve collected them in the past but since I preserved them well, my batch lasted several years. The first thing I like to do is cut the seed pods off of the tree while they are still attached. If you wait until they turn brown and fall off they become brittle and tend to break apart. I like them to be firm and green. I let them dry out for a few days. Then I prepare them by freeing them of all stems, leaves and debris. I coat them well with a layer of hairspray. It doesn’t matter what kind you use, it is the alcohol content that seals and protects the pods. I let them dry completely and then apply a second coat. This helps them to stay in tact. You can display these however you like. Decorative bowls, hurricanes, or glass jars work well. They are fun and add interest to any room.
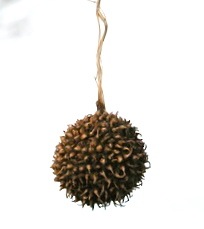
sycamore seed
Acorns
Acorns, also known as oak nuts, are nearly the perfect gift. Not only to us, as we gather them in fall, but also for the wide range of animals, who depend on them for nourishment. Many birds, such as jays, pigeons, some ducks, and several species of woodpeckers, feast on these small, power packed nuts. Small mammals including mice, squirrels, and other rodents, cache acorns away for later. Even large animals like pigs, bears, and deer, eat acorns. Although, heavy consumption of these nuts, can be toxic to other animals, like horses and cattle.
If you are gathering acorns simply to use as decoration, there is no prep or preservation required. You may gather them either from the oak tree itself or from the ground below. I am selective as to the condition of the acorns I bring home. I leave behind any cracked, broken, or discolored shells. You can, if you wish, rinse the acorns in a little bleach water ( and this may become necessary depending on where you plan to use them). If you choose to do this, make sure they dry completely before using them in your fall garnishments. Acorns are a great addition and add fall flair to any table setting, entry arrangement, hurricane, or cornucopia.
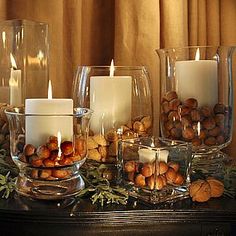
acorn and nut filled hurricanes
If your intention is to plant the acorns, there are other steps involved for preparation and storage.

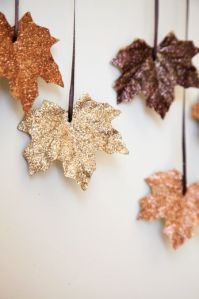
Leaves
Collecting leaves is fun and simple. You can use them everywhere. You can decoupage them onto something, make your own garland, hang them with ribbon, or place them on your entry table, buffet or dining table to add a little color.
Flowers
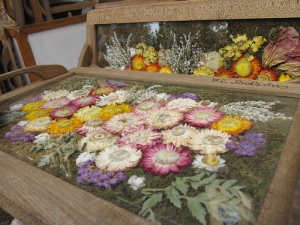
When working with flowers, the options are staggering. You can press flowers in a flower press, or between the pages of a book. You can dry the petals, or with some flowers, dry the whole head of the flower or button. You can make potpourri, flower essences, hydrosols, teas, essential oils. This category is so vast, that I will have to cover more on flowers, in another post. For now, I will stick to drying.
When I am drying flowers like hydrangeas the trick is to let them dry out naturally on the bush for as long as possible. With the best picking times being August through October (depending where you live). When they become dry and a little aged on the plant I simply cut them and arrange them in baskets, vases, or pots. No water is needed as they are now dried out. A quick coat of hairspray helps to preserve these and maintain there integrity but it is not necessary.
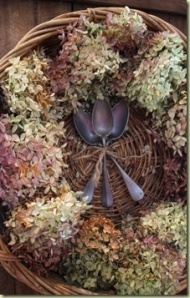
hydrangea basket
Sun flowers are wonderful all summer long, indoors and out. When summer comes to an end, sun flowers can still be useful. You can dry them and harvest their plentiful seeds. They are another flower that should be left on the stalk and allowed to fully dry out on their own (if you live in a dry sunny environment). Once the sun flower faces are turned down and have changed to a crispy brownish color, seeds should be visible. They should be plumping up and have that familiar black and white striped appearance. The sun flower must be fully dried before removing any seeds. Cut and carefully remove the sun flower heads. It is helpful to put them in a bag or basket to transport them so that you do not loose a significant amount of seeds. (You can cover your sun flower heads ahead of time with a brown paper bag or cheese cloth, or a similarly breathable fabric to discourage birds, squirrels, and other pests from harvesting your seeds before you do.) This would also help to keep seeds in place during transport. Never place a plastic bag over your sun flowers, you don’t want moldy sun flowers or seeds. After they are cut, let the heads fully dry out in a well ventilated area. This process can take about 5 days. Remove the seeds by carefully clicking them out of place with your fingers, or brush two heads together until seeds begin to loosen and fall. Rinse well in a colander, and lay out in a single layer on a towel, paper towels, or news paper, to dry. When the seeds are completely dry, you can either store away for planting or salt and roast them if desired.

sun flower
Here are some instructions I’ve found on roasting seeds:
- Soak the seeds overnight in a solution made from 2 quarts (2 liters) of water and 1/4 to 1/2 cup (60 to 125 ml) salt.
- Alternatively, you could also boil the seeds in this salt water solution for two hours instead of soaking them overnight.
- Drain the seeds on dry, absorbent paper towel.
- Spread the seeds out in a single layer on a shallow baking sheet. Roast for 30 to 40 minutes, or until golden brown, at an oven temperature of 300 degrees Fahrenheit (149 degrees Celsius). Stir the seeds occasionally as they roast.
- Let cool completely.
If storing for planting, make sure seeds have dried completely before putting them in a labeled envelope and storing that envelope in an air tight container. Store your container in a cool dry place. You can even tuck it away in a safe spot in your refridgerator.
The Screen Method
When i’m drying flower petals, I like to use the screen method. I spread them out in a single layer on a screen, carefully safeguarding adequate air flow. I leave them out as long as it takes. Sometimes they are ready in only hours and other times it may take a few days. Depending on the variety and moisture content. I do turn them over to ensure thorough drying. I also put my ceiling fan on low to speed drying time if temperatures permit. I use these for potpourri mixtures, sachets, medicine bags, and sleep pillows.
screen drying method
Herbs

gathering and wild crafting
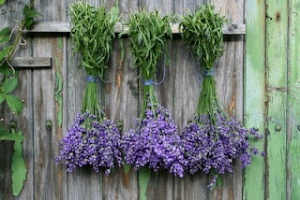
When you have herbs in your garden there are many ways to dry and preserve them. Depending on which herbs you have and their intended use. You can freeze herbs, on their own or in water in an ice tray, you can steep them in oil, freeze them in oil, add them to a butter or vinegar, or dehydrate them. One way I like to dry herbs with little effort is with the upside down drying method. This has worked well for me when drying herbs such as lavender, rosemary, sage, lemon balm, oregano, and several mint varieties. I like to pick them well after morning dew has dried but before the heat of the day. Here’s what you do in just a few simple steps.
upside down drying method
- Cut desired herbs
- Clip away leaves close to the tops of stems and tie the bunch of herbs together. Ideally, a bunch should contain no more than 5 – 10 stems to facilitate proper ventilation.
- Find a dark, dry, well ventilated, place to hang herbs away from heavy traffic. (The optimal drying temperature for drying herbs is 68* F/ 20 * C.) If you do not have a dark place you can put a paper bag over your herbs and punch holes in it using a hole punch. The paper bag will also prohibit unwanted dust from settling on your herbs.
- Leave the herbs to dry out for 1-3 weeks checking on them periodically. To see if they are ready you can rub them between your two fingers. If they crumble they are done drying.
- Remove leaves and bottle them in air tight containers or glass jars. I keep the leaves whole and only crush them when i am ready to use them.
6. Label and date everything to ensure freshness.
upside down drying method
Freezing Method
Freezing herbs is easy and herbs prepared this way can last for months. ( Not all herbs can be frozen) For herbs that can, here it is in 3 easy steps.
- Properly wash and pat herbs dry
2. Place them on a baking sheet and place in your freezer over night.
3. Place frozen herbs in sealed containers in your freezer for later use.
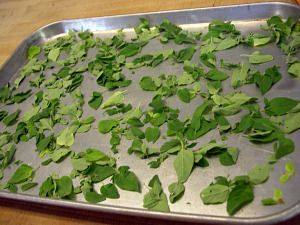
freezing method
Freezing in Water Method
- For longer storage, freeze herbs by snipping leaves into small bits.
- Drop the tiny pieces into an empty ice-cube tray, filling about ¾ full with water, and freezing; one tablespoon of herbs per cube is plenty.
- The next day, top off with water and freeze again (this covers the floating pieces with ice to prevent freezer burn).
- Pop the finished cubes into a sealed container in the freezer.
Drop frozen cubes into soups, stews, for fresh-cut flavor. You can use one type of herb per cube or you can use a mixture.
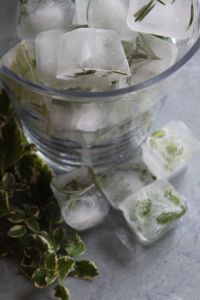
herb cubes
Herbal Butter
- Another great method for preserving herbs for cooking is to make them into flavored butter and freeze that.
- Mince 1 part herbs (one type, or a blend)
- Mash into 2 parts softened organic butter, shape into log, and freeze.
- Slice your herb-flavored butter as needed to melt over your favorite dishes or use to sauté in recipes for a summer taste all winter long.
Garlic and parsley or garlic and rosemary make great butters for garlic bread, sour dough toast, or baguettes.

herbal butter
Garden Vegetables
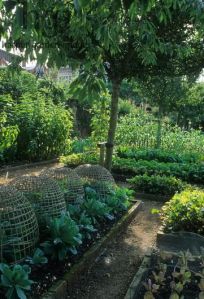
garden vegetables
I have two gardens and I grow a little bit of everything; asparagus, chives, oregano, rosemary, kale, basil, spinach, zucchini, squash, cucumbers, the list goes on. What I love to grow more than anything else, is ingredients for salsa. This includes several varieties of tomatoes. Including, little yellow heirloom pear tomatoes, grape tomatoes, early girl, big boy, roma, cherry, ( too many more to name), tomatillos, cilantro, onions, jalapenos and other peppers.
We roast our ingredients before blending them in our vitamix. In our house, fresh salsa is something we can never get enough of. We like it served both hot and cold, and we use it on virtually everything! I have also had great luck freezing it. I pour it into glass containers with snap lids and it stays fresh for months. When we are ready to use it, I simply let it defrost in the refridgerator. By freezing it, we are able to have fresh home made salsa year round.
I make lots of sauces and soups from of our harvests and use our fresh produce in everything from pasta dishes, pesto, and dips, to smoothies and salad dressings. I’ve even pickled onions and cucumbers for a tasty treat.
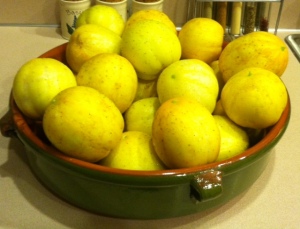
lemon cucumbers off the vine
Recipe for Pickled Cucumbers (given to me by my neighbor)
- lemon cucumbers seeded and cut into strips
- one sweet onion peeled and sliced into strips
- fill the jar with half white balsamic vinegar and half water
- sweeten with sugar or agave to taste
- allow to marinate in refridgerator for at least an hour
- enjoy.
- ( add more cucumbers and onion as your supply depletes) the liquid remains good for a few more batches
- store in fridge
Wisteria
I have four wisteria plants flanking my pergola. They all come together creating a lovely canopy that shades us from the suns rays and even protects us from the rain. When we give these a good trim in the fall, I like to use the vines to make wreaths. You simply remove the leaves and twist them into a desired shape. You can use wire to secure them but it isn’t necessary. I have a wreath made out of wisteria, hanging on my front door. I fashioned a star in the center of it, out of willow branches.
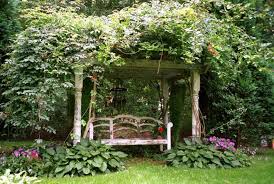
wisteria canopy
Willow Branches
I have a “Curly Scarlet Willow,” tree that literally has curly branches. I keep a big basket of these thick, robust, branches in our living room. It makes me feel like we have a tree in that space. In the bathroom, I have some smaller sticks in a vase on the counter. You can use these sticks and branches for many different projects. I’ve used them to make bean and pea teepees in the garden. We’ve made them into trellises and used them as perches on bird houses. We also frequently use them to stake up plants. (My neighbor uses the soft swinging vine type branches on my tree, to make her wreaths.) When you have a tree like this it never stops giving. People pay good money for these type of twigs and sticks, at craft and specialty shops. I am lucky enough to have them at my disposal. I am always happy to share.
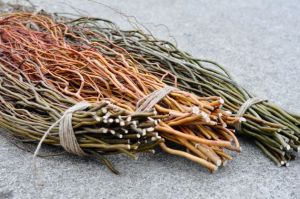
Curly Scarlet Willow branches
If I keep you here, reading my post any longer, you will miss out on all the fall fun! So, I’ve decided to wrap things up with bit about gourds.
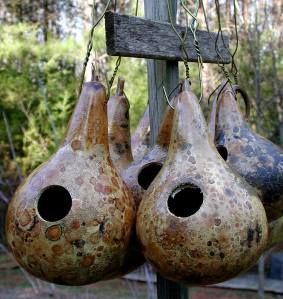
Gourds
I love to grow and preserve gourds. They can be very festive, if you just put in a little work. Gourds are ready for harvest when the stem turns dry and brown. You should cut a few inches of stem along with the gourd. Take care not to bruise the gourds during harvest as it could increase the likelihood of decay. Gourds should be carefully selected, eliminating any premature, bruised or broken fruit. Wash with soap and water, dry, and apply alcohol to the surface. Drying the outside of the gourd should roughly take about a week. Then you need to place the gourds in a clean, dry, well ventilated, area to fully dry out the inside of the gourd. Arrange them in single rows, ensuring that they do not touch each other. A slatted tray, or screen will be perfect for air flow. Check on your gourds daily to make sure none are showing signs of mold. If there is mold on the outside shell it can be wiped clean and can be allowed to continue to dry. If any are showing signs of decay, are warped, misshapen, or have soft spots, dispose of those immediately. Turn gourds periodically to promote even curing. The whole process can take a couple of months, but depending on the type of gourd you are drying, it can be longer. When your gourds are completely dry and are super light weight, they can be polished with a very fine steel wool or sandpaper. Treat the dry shell with alcohol, then seal or shellack for the final finish. These can be used in a number of projects. Bird houses, and fairy houses, are my favorite things to make out of gourds.
It is my hope, that you found this post both helpful and informative. Now, when you go out collecting natures treasures, you will be equipped with some ideas of how to use and preserve them.
Happy Hunting!


